

I’m so glad that you’re part of the Over_Under project, helping to keep 5,000 t-shirts out of landfills by the end of 2026. To date you’ve helped keep 300+ shirts out of landfills, I can’t complete this project without you and your friends. The over_under project is here to give hope. When everything seems like chaos around you, know that you can make a difference
3 Ways That You Can Help This Week:
Let me know how many t-shirts you’ve put to another use instead of donating or discarding.
Become a paid subscriber and help the Over_Under Project Continue to Grow.
Use the bottom below and gift a subscription to one of your friends.
I needed to vacuum the carpet, which meant that I needed to move the chairs, which meant that I might as well move the shelves and build the new shelves, which meant that I had to move things off some shelves and onto new shelves. And now that I had so many new shelves, I needed more baskets. I carefully displayed the coiled baskets I made in college—one for an assignment, another as an example while I was student teaching. After I taught them how to crochet, two high school students gifted me a basket they crocheted. I positioned a small cooper try from a friend alongside some ceramic bowls I made in college and one bowl gifted by my uncle after an overseas trip. I needed to vacuum the carpet.
I needed to make some baskets.
Every cleaning project starts as an act to avoid a more challenging task and ends in a creative endeavor, leading to a larger mess that I need to clean up.
I needed to vacuum the carpet.
I needed to make a basket.
I needed to convince you that you, too, need to make a basket.
Step one: Get out your vacuum
Step two: collect your materials
Step three: make a basket


Let’s learn how to make a basket
Materials:
T-shirts that are two different sizes. I used Adult XL [4 shirts] and Youth Small [12 shirts]. The purpose of the two sizes is because we’re going to make a rectangle instead of a square.
Peg T-Shirt Loom
Scissors
Tapestry Needle
Crochet Hook
Set up your loom:
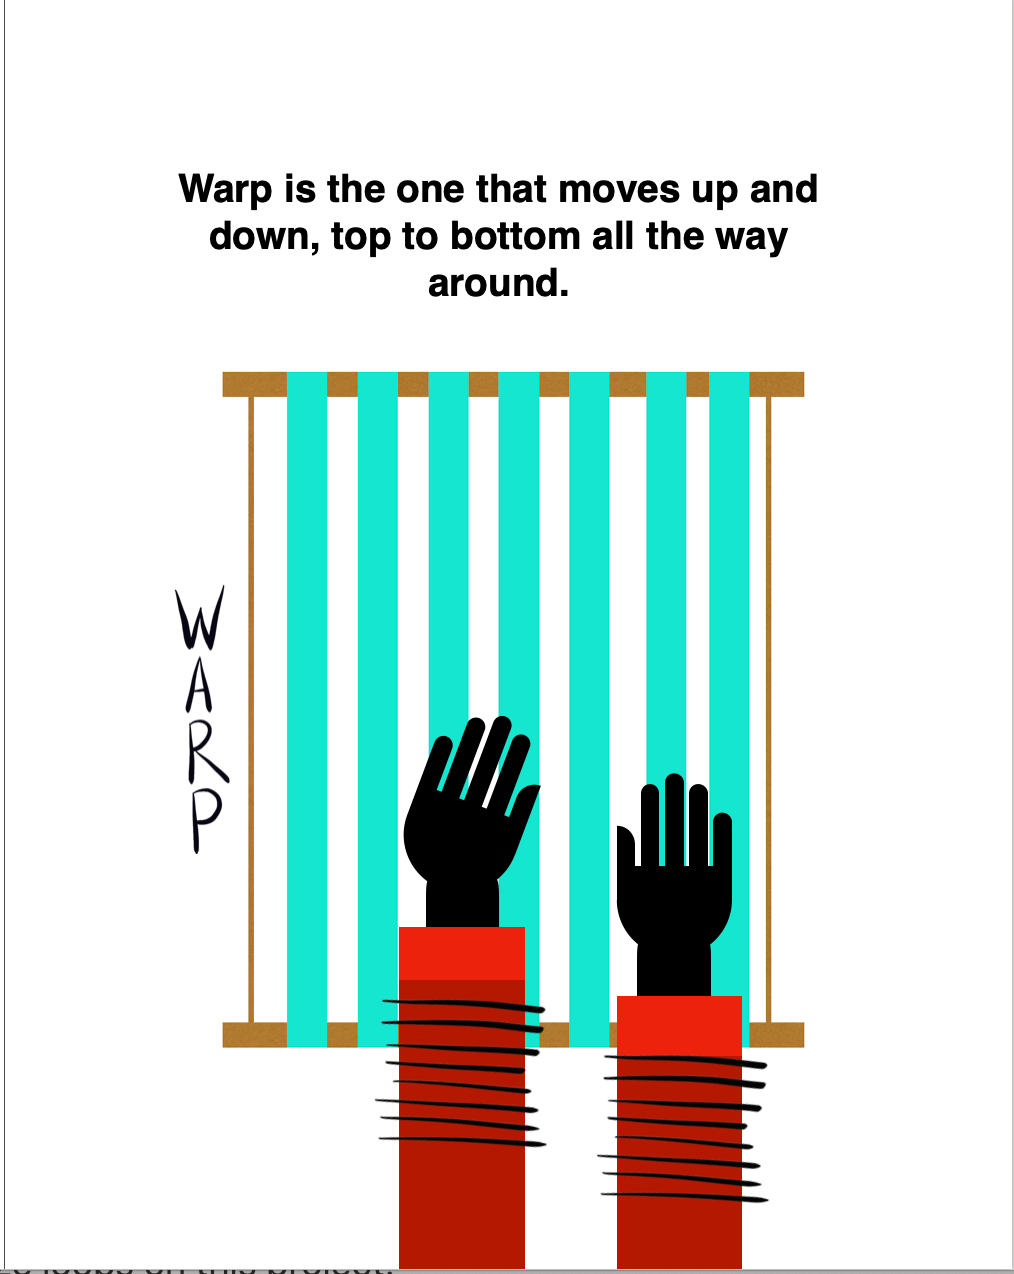
Image from The Weaving Book
Step 1: Cut and Measure Warp: Cut one loop from the body of your largest T-shirt, we’ll use it to measure and determine the spacing for your warp pegs. Hook one of end of the T-Shirt on a peg, then stretch to the other end, adjusting the placement of the second peg as needed to ensure that the loop is stretched.
Step 2: Adjust the Warp Pegs: Now that you know the spacing needed for your warp pegs, move all of them into the correct place on your loom.
Step 3: Cut and Measure Weft: Cut one loop from the body of your smallest T-shirt, we’ll use it to measure and determine the spacing for your weft pegs. Just like we did in step one, repeat.
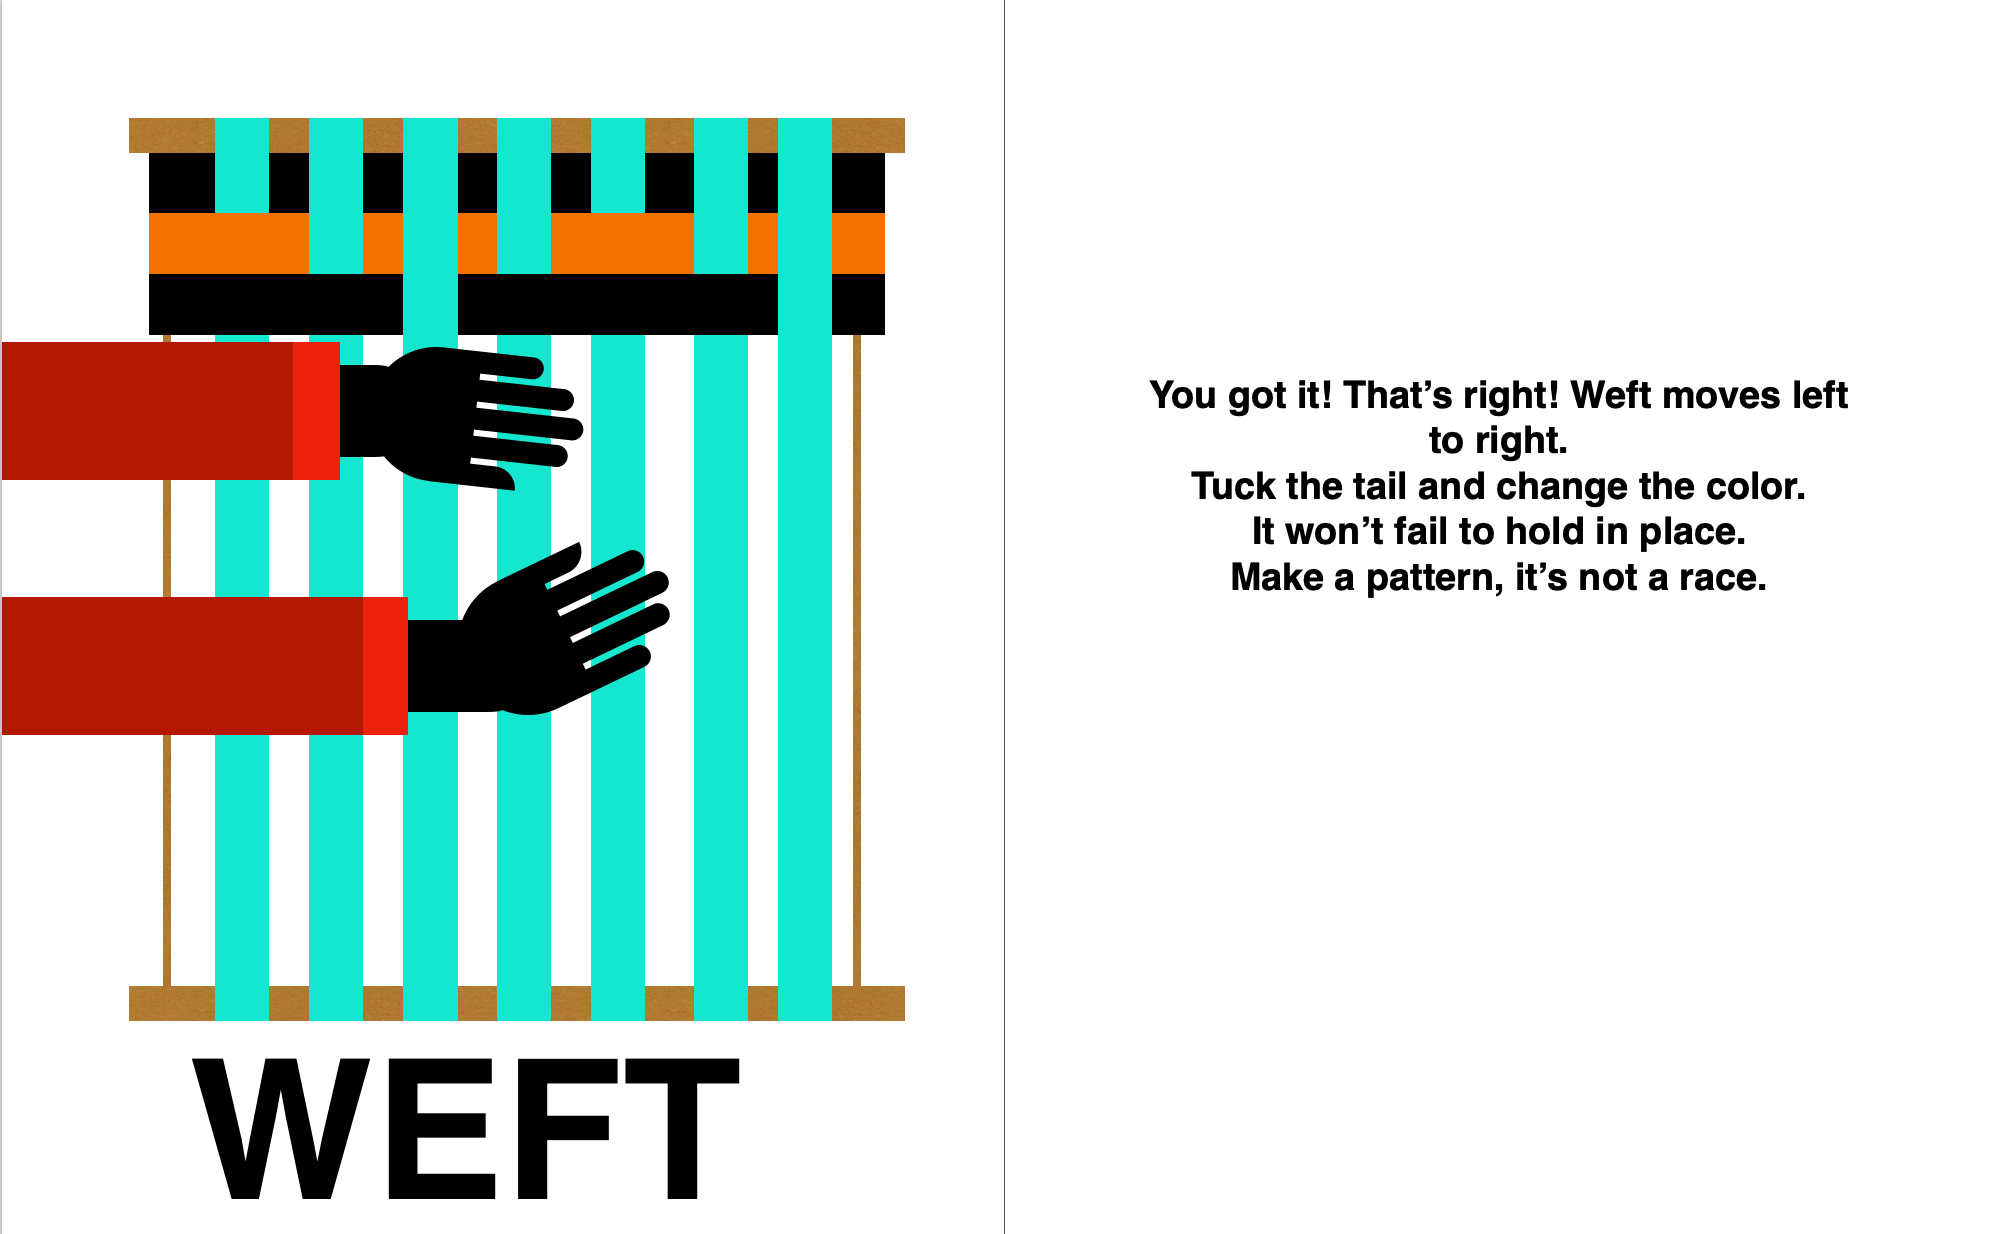
Image from The Weaving Book
Join the Over_under project and help to transform the world around you. Unlock exclusive guidebooks and super simple giveaways.
